Saturday 6 December 2014

Christmas Wreath Workshop, Love Grows Wild / Homemade Christmas

Things are getting very christmassy around here. Last weekend, not only did William's + Griffin's unveil their wondrous Christmas window, complete with animatronic polar bears, and the Mayor did the High Street Christmas light switch on, complete with firework display, we got our tree. And it was because of our tree that I sadly missed the lights being switched on (although I did hear the fireworks). We had a slight Clark Griswald situation at home ie tree rather too large for room, which then took hours to decorate. So many hours in fact that by the time I'd slung the last bauble on it, I'd missed the towns festivities. Note to self, don't let the Wig go to buy the tree alone next year.


Griswald!

But not only have we been tree decorating, we have also been making a few other Christmas decorations (kills time and is a very cheap activity. Win win situation). First of all, we made some Chrimbo cards. I don't think Clinton's have anything to worry about but Auntie Margaret was impressed.


Glitter, glue, washi tape, stamps.

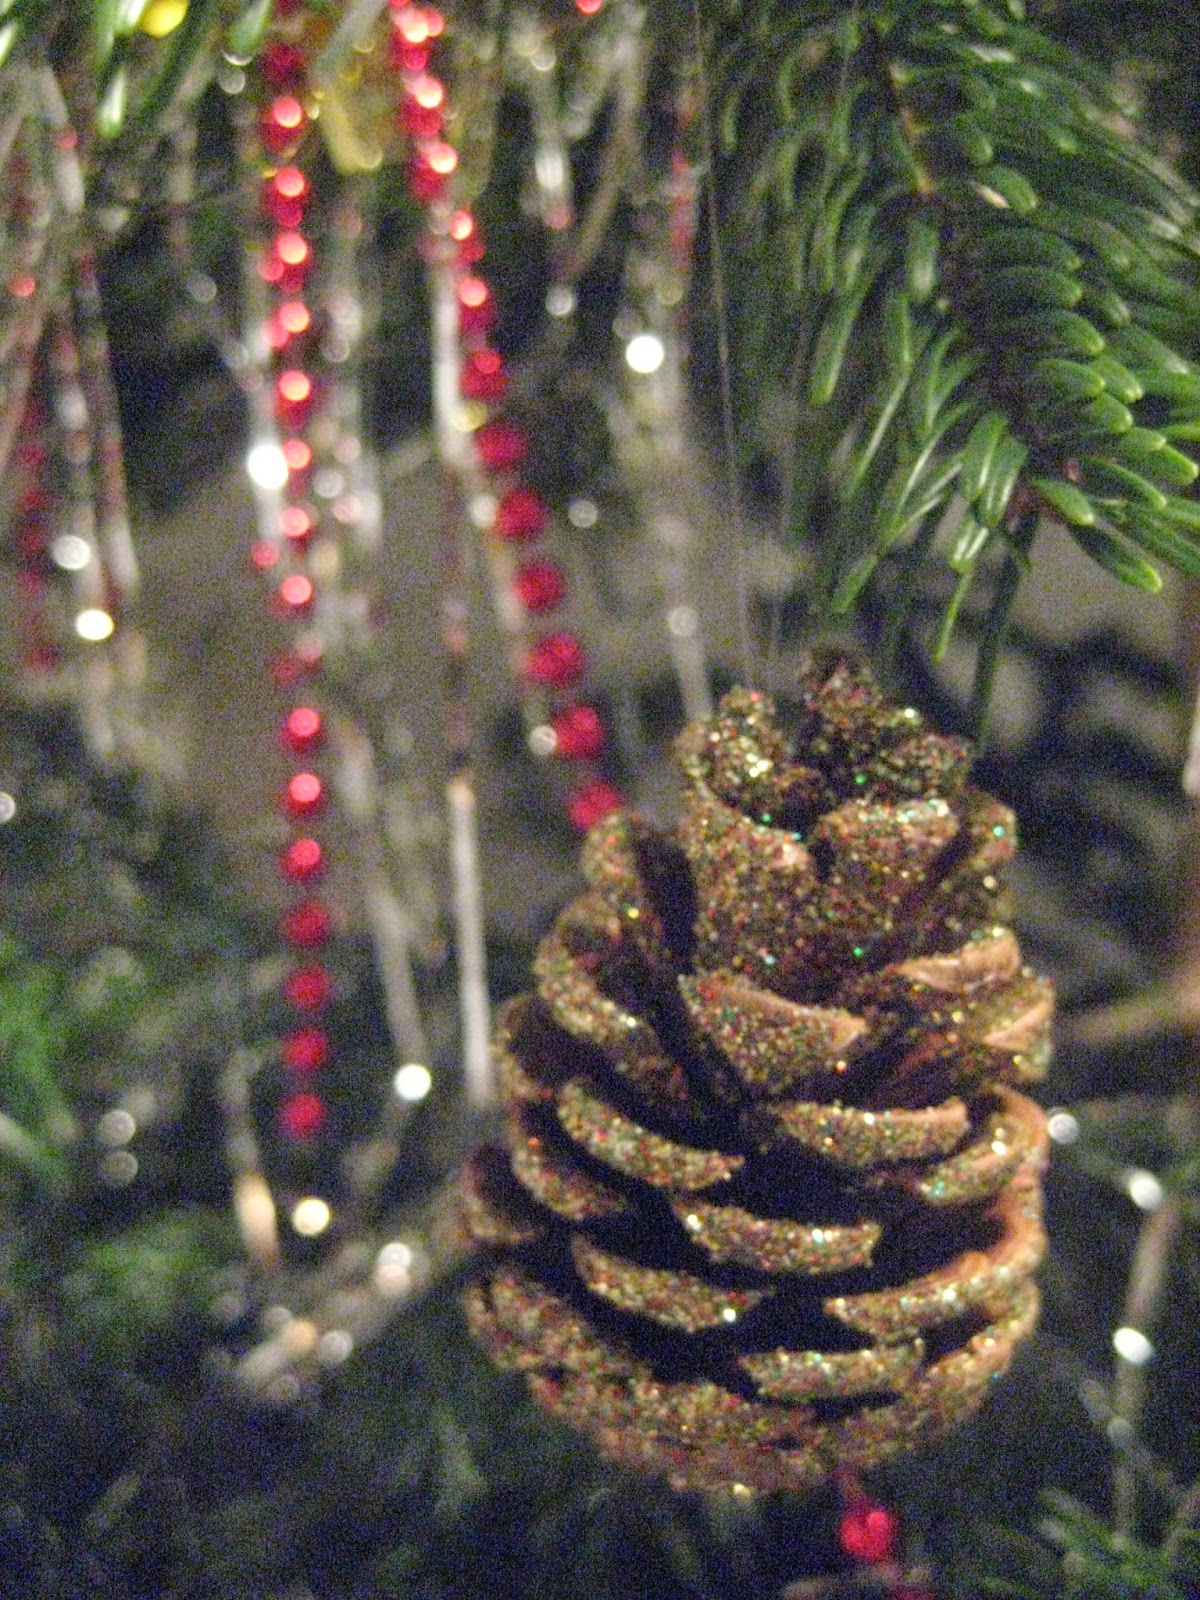
Then, we covered some pine cones in glitter. Very quick, easy and really pretty on the tree.


Glue, glitter and pinecones

Finally, we made a couple of snow globes. There were very easy and quick to make and just need a bit of forward planning to keep a few old jars. The hardest thing to find for making these were the Christmas cake figurines but you could easily make these with old plastic toys instead.

To make a snow globe, you will need:

1 x Plastic / Christmas Cake figurine
1 x Clean jar
Superglue
Some glitter
Tap Water
Drop of glycerine (from baking aisle at supermarket, this thickens the water and makes the glitter fall more slowly)

* Superglue your figurine to the inside of the jar lid, wait to dry.
* Sprinkle you glitter into the jar.
* Top the jar up with water.
* Add a teaspoon of glycerin to the water/glitter and stir.
* Add a ring of superglue to the jar rim then quickly put lid on and wait from glue to dry.
* Voila!

Baby reindeer in Nescafe jar.


Fat Santa in jam jar with washi tape to jazz up the lid.

 We also made mince pies but this was just frozen puff pastry and a jar of mincemeat so I wont bother explaining how to do those!


However, of all the Christmas crafts we have been making this week, my favorite project was the one I did this morning (minus boy child) at The Waiting Room. Sian Willis from Love Grows Wild, a local florist, ran a 2 hour workshop to show how to make a Christmas Wreaths. £30 covered the cost of 2 hours 'tutoring', all materials (foliage, berries, ribbon, wire frame etc), a hot drink and a mince pie! It was a really great way to spend the morning and another way to meet some new faces. A lovely  relaxed atmosphere I'm over the moon with my wreath. I just hope it doesn't get swiped off the door before the 25th!...


Ta dah!

PS: Just a note for your Christmas decorations next year. While you are out and about at the shops, if you see any Christmas decorations in any shop windows that you like the look of, ask them if you can have them when they have finished with them.  I swiped 3 of these huge gold bows from Laura Ashley  last Christmas and they were going to get thrown away!


Saturday 29 November 2014

East Coast Diner, Red Lion Yard Colchester

Well I must say it was a most pleasant day in Colchester today. Not only was the sun shining but I had a delicious breakfast at the towns newest eatery then trotted across the street and had a sniff around a Vintage Fair. Very pleasant.

First of all, and I was very happy about this particularly after a heavy night out in Southwark, the East Coast Diner opened for business in Red Lion Yard.


Red Lion Yard dates back to 1465 and runs off the Colchester High Street. It has recently undergone a £600K refurbishment and looks great. The Company behind the refurbishment used beautiful york stone for the pavement, all the shops signs have the same size/colour font, there is an attention to detail here which makes it a great little place. It is also getting some interesting boutique type shops going into it. Proctors Sausage Shop were already there, but there are also a couple of Hairdressing Salons, a nice home wares shop and a couple of independent clothes shops. White Dirt being one of them and while I am probably too old and fat for their clothes I think this is a great shop. Maybe I could buy a bag.

But the newest kid on the block/yard is East Coast Diner. They opened their first branch in Woodbridge and things are obviously going well as they have opened their 2nd branch today in Colchester. Giles Coren said in The Times that their hotdogs are "the best in Britain. No question". Blimey. They opened at 10am, again we don't like to look too keen, so we got there at 10:17am... We were greeted by friendly staff and a balloon for my son. If he is happy. We is happy. Especially if 'we' are feeling slightly fuzzy after a night on the tiles. They don't have a huge space but I quite liked that it was compact, it created a really friendly environment. The decor is well done (bright Tolix style stools, wooden plank and scaffolding tables, a couple of bits of graffiti, a lovely yellow booth) and they played decent music. It was a nice place to hang out basically. We also liked that they were so child friendly. Plenty of high chairs, pencils and a colouring competition, a good kids menu, and a relaxed atmosphere. But on top of all this the food was delicious and VERY reasonably priced. We had 2 x coffees, 1 x fruit smoothie, 1 x shake, 2 x Breakfast baskets and cost just over £24. Great value not to mention the convenience for us as its 1 minutes walk from our house! I have a feeling East Coast Diner are going to be seeing a lot of us from now on...


Their Breakfast basket consists of 2 x hash browns, the most delicious beans I have ever eaten and a huge breakfast muffin with sausage, bacon, cheese and egg. It was so huge in fact I couldn't finish it. This muffin defeated me. No meal has ever done this to me so that's quite an achievement. 
Bravo ECD. You beat me fair and square.


Fresh fruit smoothie


Food hatch


Booth


Told you.

Then after a most enjoyable breakfast I walked across the road to the Secret Vintage Fair which was being held at Liquid, a nightclub on the high street. I paid my £3 entry fee, walked across the sticky nightclub carpet and had the biggest shock I've had in a long while. Liquid nightclub, which I have obviously never been  into to, is beautiful inside! I knew that it was in a very old building being built in 1905 and having been the old Grand Theatre but had no idea what was behind the door. What a shame that its not still a theatre, it could certainly give Hackney Empire a run for its money. I don't know what kind of person would allow such a beautiful building to be turned into a sticky carpeted nightclub but sadly there are lots of historical buildings and areas in Colchester that have not been given the right kind of respect. Massive shame that.


Giant disco ball suspended from stunning ceiling


Beautiful balconies

The fair itself was really great. They had loads of stalls with vintage clothes and home wares but also music, dancing, a beauty parlour, vintage hair styling, a nail bar and a Pop Up Tearoom on the top floor. A great event, well organised and I even treated myself to a new sewing box. Thanks Colchester, today you were pretty great.


Stalls


Desperately needed cantilever sewing box, £15. Bargain!

Friday 28 November 2014

Trine Hahnemann's 'Shower Buns'

My love affir with Trine Hahnemann continues. I never thought I would say this, but after 39 years, Delia Smith has finally been knocked off the top spot of my top 5 favorite cooking people. I grew up with my Dad cooking Delia recipes. They were the only cookery books we had at home. The first recipe I used as a child was her recipe for 'Plain Scones', page 283 of 'Delia Smith's Cookery Course Part Two'. When my Dad passed away those books were the first things I wanted to retrieve from his place and I still use them. Good old, faithful Scones. Still going strong.


Delia's scones.

However, since I have discovered Trine Hahnemann there is new number 1 in town. I do feel very guilty about this particularly as Christmas is coming and Delia has been a faithful companion for many years at Christmas time, but Delia had a good run. I'm sure she would understand.

I am maniacally working my way through her 'Scandinavian Baking' book and can't seem to put it down. Some people take erotic fiction to bed or a kindle. I take books about Scandinavian food. It used to be books about Interior Design but baking is a much cheaper habit. The main reason I am enjoying her books so much is that her recipes use a manageable list of ingredients that are not impossible to source. I often find dishes I would like to cook but the list of ingredients is too long or the ingredients themselves are too obscure. I have virtually no spare time as it is at the moment running round after a toddler and dragging him round the shops looking for unwaxed Ewes milk is a bridge too far (sorry Ethicurian's).


Wow. Feats your eyes on that cake!

My favorite recipe at the moment is her recipe for 'Shower Buns', so called as by the time you take to have a shower in the morning, they are cooked. They are a revelation and consist of four ingredients. That's right, FOUR. They are going to change my life and push me in the direction of elasticated waistbands. These buns are cheap, quick, simple to make and most importantly, delicious. The idea is that you make a batch of dough which can be kept in the fridge for up to 5 days, and each morning you scoop a few dollops of the mixture onto a baking tray and voila! By the time you've had a spruce, breakfast is ready! How awesome is that! The first morning we tried these, we ate them with jam but on reflection I think that was a waste of a bun. So every morning since I have been starting my day with a streaky bacon and rocket shower bun. What luxury! (The highlight of my days this week actually). However, I wouldn't limit these buns to just the morning, they would be equally handy/delicious at lunchtime on their own or with soup. Yumsters.

Shower Buns

15g Fresh Yeast
700ml Cold
8g Salt
850-900g Strong White flour

(Firstly, since this was my first attempt, I only used half quantities of the ingredients. This made approx 10 buns, enough for us for a week. Also, I didn't have enough Plain White Flour so I ended up using two thirds plain white flour and one third rye flour. But as Trine says you can swap different types of flour around to what you prefer and also use seeds if you like. Finally, I didn't have fresh yeast so used 7g of Dried Yeast).

* Dissolve the yeast into the water, add the salt and flour and mix well.
* Knead with a mixer of by hand using a wooden spoon - thus mixture is very sticky you wont want to use your hands.
* Cover with clingfilm and leave in the fridge overnight.
*When you are ready for your buns, pre-heat the oven to as hot as it will go.
Cut off / spoon out required mixture and place on a baking tray lined with baking paper. I used a big tablespoon sized dollop per bun.
*Slash the top of each bun with a very sharp knife.
* Cook for 5 minutes on the high heat the reduce the temperature to 210C/Gas Mark 6.5 and cook for a further 15-20 mins or until the buns are browning.
*When cooked, remove from the oven and rest for 5 mins before serving.


The dough the morning after.


Our first buns.


Oink.

When the buns first came out of the oven the crust felt very hard but as they cooled slightly the crust magically softened and the buns had the texture inside of a ciabatta. I can't say enough good things about these buns. You have to make them. Thank you Trine, I think I love you.

Tuesday 25 November 2014

Cross Stitch Crazy

Apparently the Devil makes work for idle hands. Having no idea what sort of horrors Satan would sling my way, and no desire to find out,  I have taken up my Cross Stitch hobby again. Frankly we have enough stress on our plate at the moment without having to stoke the firey pit of hell for a man in red tights and a bad temper. Also, I remember my Dad hollering at me one School Summer Holidays when I complained of being bored, "Only boring people get bored!" So I find it impossible to sit around doing nothing incase it confirms what I have long suspected.

I did a bit of Cross Stitch last year when my son still had his daytime naps and I found it strangely addictive. Sadly those naps have long gone (sob) but as I have no social life in the evenings anymore, I have plenty of time to sew. There is a great magazine called Crossstitcher which often has free little projects for you to make which are a bit nicer than the other Cross Stitch magazines which, in my limited opinion, tend to be a bit fuddy duddy. Other good reference for more modern Cross Stitch projects by absolute Professional stsitchers are:

Satsuma Street -Colourful, modern, abstract designs.

What Deliah Did - Predominantly nature inspired designs. She's has also just brought out a great Christmas Cross Stitch book.

Mr X Stitch - A man!


This was my first sewing last year, copied from a pattern in Crossstitcher. Quite an ambitious design which took bloody ages. It has been folded up in a drawer since. Not quite sure what to do with it . . . .


This was my 2nd attempt. An amalgamation of things I had seen online.
Considerably smaller. Again folded up and stuck in a drawer. Shame.


For my son. Designed by my own brain.

So since Christmas is on its way, I thought I would make my son a Christmas stocking. The red felt cost about £7 from the local haberdashers and I had accumulated all the other bits and bobs from my 'Wedding Bag' and various little projects from Crossstitcher. I'm not sure that the 'Big FC' (aka Santa) will be able to put the little man's desired gifts in (a 'blue bike' and 'big giant teddy'), but there's definitely room for a few satsumas and a Cadburys Selection Pack. Overall it probably took about 7 hours and is much more personal than anything I could have bought him in the shops - it even has a little picture of him on the front so Santa knows who it belongs to.


Voila.


My son.


The Big Man.


Sons initial on 'luggage tag'.


I made the buttons too.


And finally, these 2 little fellas that were meant to be made into Christmas Cards, I have made into decorations to hang onto the tree.


Monday 24 November 2014

St Botolphs Letterpress at The Waiting Room

The Waiting Room. It just keeps getting better and better. As well as the events I have already mentioned in some of my recent posts, this Saturday they held an awesome Printroom Open Day event. I've never used a Letterpress before, although I did buy a book about American Letterpress when I was planning my Wedding that didn't happen, but have always thought it would be great to try one out. We very nearly booked ourselves onto a Course in Walthamstow a few years back but sadly work scuppered that particular plan. Stupid old work. Now, however, there are the facilities to use a wonderful press at The Waiting Room. I'm not entirely sure how one can access it but I think if you had some ideas of prints you wanted to make, you could contact them and go and use it! What a great resource! I believe The Waiting Room were given an old press and a whole heap of bits and bobs that they have spent the last few months beavering away, cleaning and organising. But now it seems to be ready and up and running.

You can find out about their forthcoming events and other titbits via these links:

St Botolphs Letterpress

St Botolphs Printroom

The great thing about Saturday's event, not only that it was just up the road (and everyone was super friendly), was that I got to make my own print (when I say 'made' I didn't set the type but I did put the paint on and peel the paper off!), my son got to make his own little bag AND we got to meet the guys at Typoretum. They are a local Company who gave up their "real" jobs to follow their dreams of running a Letterpress business. It's going so well that they were involved in the title sequence for '12 Years a Slave'! How great is that?! Total inspirations. They not only do they sell beautiful cards and prints on their website they also run courses which you can find out all about if you click on their name above.

Nice work Waiting Room guys, another very interesting trip out.


Their small Adana Press. I didn't manage to get into their actual 
Print Room which was a shame but hopefully another time.


Bag making area


The bag my son made. 
I'm going to say its 'Moschino Cheap & Chic' if anyone asks.


The Typoretum Press


My print! Still being flattened. 
Think it will look super next to the Anthony Burrill's.


A limited edition print made by the St Botolphs folk using their wondrous acquisition.

Cinnamon Buns by Felicity Cloake / Bread + Butter Pudding

The Danish Cinnamon Bun. I have looked into a few recipes but this seems to be the most successful. Also the beauty of this recipe is that it's almost 2 cakes in one! It was massive! I defy anyone to eat it in one sitting unless you have lots of visitors. We ate it fresh from the oven on Friday afternoon, perfect for a rainy day, then on Saturday when we had friends over, I made a Bread and Butter pudding. Win.

Cinnamon Buns by Felicity Cloake

For the dough:
300ml Whole milk
1tsp Ground Cardamon Seeds
50g Butter
425g Plain Flour
7g Fast Action Yeast
60g Caster Sugar
1/4 tsp table salt
1 Beaten Egg
A little oil


* Put milk in a pan with Cardomon seeds and heat until just below boiling point.
* Remove from the heat, stir in butter and set aside.
* Mix the dry ingredients in a bowl, make a well in the centre, add the beaten egg, strain the milk then add it to the mixture.
* Stir until dough comes together.
* Tip onto a slightly oiled surface and knead for 5 minutes.
* Cover and leave somewhere warm for 30 minutes.


For the Filling:
75g Butter
50g Dark Brown Sugar
2tsp Cinnamon
1/2 tsp salt

For the glaze:
1 Beaten egg
Demerara Sugar

* While the dough is rising, make the filling and preheat oven to 200C /Gas Mark 6
* Mix all the 'Filling' ingredients together until it resembles a smooth paste.
* Grease a 23cm springform cake tin cake tin.
* Roll dough out on lightly floured surface and roll to a 25cm x 35cm size
* Smear filling on top then roll up like a swiss roll.
(Felicity suggests cutting the long swiss roll into 7 pieces and arranging in the tin but I found my buns were huge. A sentence I never thought I would write. When I make it again I will make more smaller buns and cook in a bigger tin).
* Finally glaze the cake with beaten egg and sprinkle demerara sugar on top.
* Bake in the oven for 25 mins or until golden on top.


There are millions of recipes for Bread + Butter pudding but the below is one I made with what I had in the house.

Bread + Butter Pudding

Slices of Cinnamon Bun)
Butter 
Handful of dried cranberries
2oz Caster Sugar
10fl oz Milk
2.5fl oz Double Cream
1/2 Lemon Zest
3 Beaten Eggs
Mixed Spice

* Slice the bun to fit your tin and butter them all on one side.
* Lay first layer of bun in the bottom of tin and sprinkle cranberries on top
* Place a 2nd layer of bun in the tin and sprinkle with remaining cranberries.
* Mix together the milk, cream, sugar and lemon zest.
* Finally mix in the 3 beaten eggs.
* Pour it all over the bun layers, sprinkle with Mixed Spice and put in the oven for approx 30 mins at about 180 Fan.


Lovely pudding, crappy camera.